HTTP/2 有什么优点?
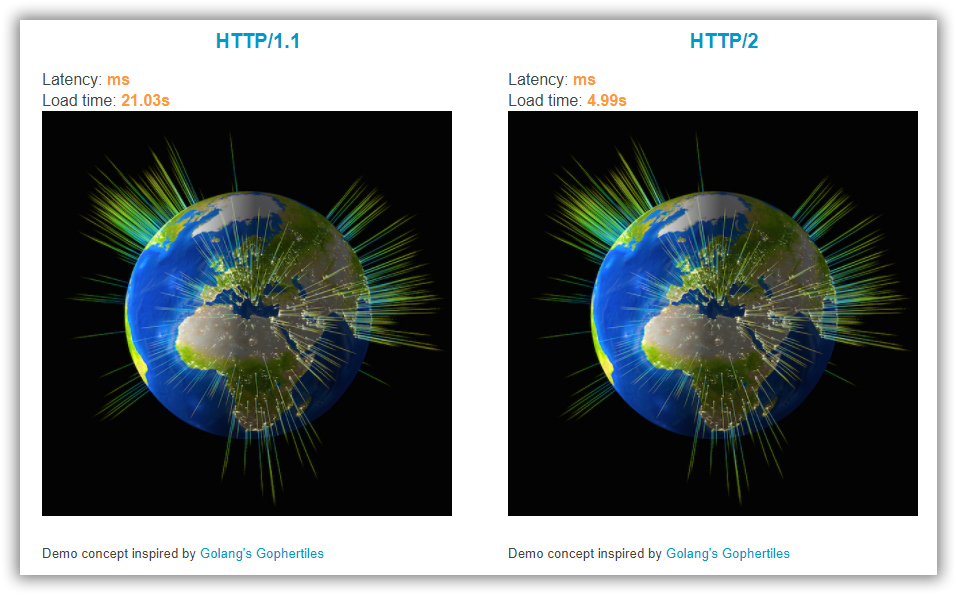
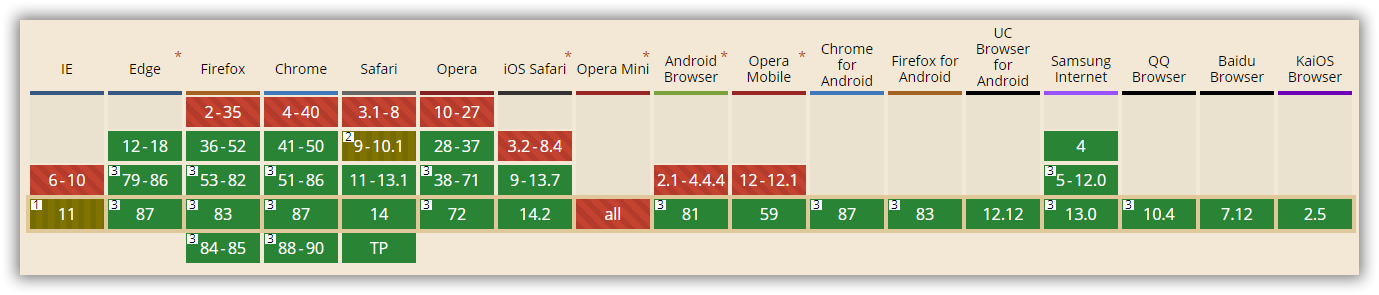
HTTP/2 简称 h2, 基于 SPDY 演进。与 HTTP/1.1 相比,HTTP/2 最直观最明显的特点就是速度变快了。另外,目前绝大多数浏览器都支持 HTTP/2,因此让网站支持 HTTP/2 是势在必行了。
目前绝大部分网站都启用了 HTTP/2,比如我们常用的 Google, 知乎,微信,微博等。
NGINX如何配置启用?
NGINX 启用 HTTP/2 很简单,只需在配置文件的 listen 处加入 http2 即可。
listen 443 ssl http2;
listen [::]:443 ssl http2;
修改完成后,重新加载或者重启 NGINX,顺利的话刷新浏览器就可以发现已经成功启用了。
nginx -s reload
HTTP/2 启用失败问题排查
如果重启后发现没有生效,则需要排查一下以下三点:
- NGINX 版本是否>= 1.9.5
- NGINX 配置参数是否有 –with-http_v2_module
- OpenSSL 版本是否 >= 1.0.2
只需查询 NGINX 版本就可以知道是否满足以上三点。
user@host#: nginx -V
nginx version: nginx/1.16.0
built by gcc 4.8.4 (Ubuntu 4.8.4-2ubuntu1~14.04.4)
built with OpenSSL 1.0.1f 6 Jan 2014 (running with OpenSSL 1.0.2n  7 Dec 2017)
TLS SNI support enabled
configure arguments: --prefix=/etc/nginx --sbin-path=/usr/sbin/nginx --modules-path=/usr/lib/nginx/modules --conf-path=/etc/nginx/nginx.conf --error-log-path=/var/log/nginx/error.log --http-log-path=/var/log/nginx/access.log --pid-path=/var/run/nginx.pid --lock-path=/var/run/nginx.lock --http-client-body-temp-path=/var/cache/nginx/client_temp --http-proxy-temp-path=/var/cache/nginx/proxy_temp --http-fastcgi-temp-path=/var/cache/nginx/fastcgi_temp --http-uwsgi-temp-path=/var/cache/nginx/uwsgi_temp --http-scgi-temp-path=/var/cache/nginx/scgi_temp --user=nginx --group=nginx --with-compat --with-file-aio --with-threads --with-http_addition_module --with-http_auth_request_module --with-http_dav_module --with-http_flv_module --with-http_gunzip_module --with-http_gzip_static_module --with-http_mp4_module --with-http_random_index_module --with-http_realip_module --with-http_secure_link_module --with-http_slice_module --with-http_ssl_module --with-http_stub_status_module --with-http_sub_module --with-http_v2_module --with-mail --with-mail_ssl_module --with-stream --with-stream_realip_module --with-stream_ssl_module --with-stream_ssl_preread_module --with-cc-opt='-g -O2 -fPIE -fstack-protector --param=ssp-buffer-size=4 -Wformat -Werror=format-security -Wp,-D_FORTIFY_SOURCE=2 -fPIC' --with-ld-opt='-Wl,-Bsymbolic-functions -fPIE -pie -Wl,-z,relro -Wl,-z,now -Wl,--as-needed -pie'
可以看到,我安装的 NGINX 版本只有第三点不满足。其实无论哪一点,只需升级 NGINX 版本就都能解决。
Ubuntu 升级 NGINX 版本
更新 apt 源到文件
echo "deb http://nginx.org/packages/ubuntu `lsb_release -cs` nginx" \
    | sudo tee /etc/apt/sources.list.d/nginx.list
更新命令
user@host#: sudo apt update

W: GPG error: http://nginx.org/packages/ubuntu bionic InRelease: The following signatures were invalid: EXPKEYSIG ABF5BD827BD9BF62 nginx signing key <signing-key@nginx.com>
更新出现这个错误,可能是由于 NGINX 的 apt-key 过期了。执行以下命令验证看看:
user@host#: sudo apt-key list
/etc/apt/trusted.gpg
--------------------
pub   rsa2048 2011-08-19 [SC] [expired: 2016-08-17]
      573B FD6B 3D8F BC64 1079  A6AB ABF5 BD82 7BD9 BF62
uid           [ expired] nginx signing key <signing-key@nginx.com>
可以看到 [expired: 2016-08-17] 说明在 2016 年时过期了。现在更新一下 NGINX apt-key:
wget https://nginx.org/keys/nginx_signing.key -O - | sudo apt-key add -
再次执行 sudo apt-key list 可以发现,过期时间变成几年后了。接下来就可以继续升级 NGINX:
sudo apt update
sudo apt install nginx
升级完成后,刷新浏览器就可以发现网站已经启用 HTTP/2 了。
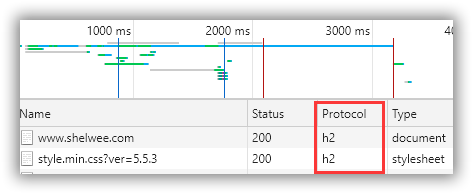
如何查看网站是否启用了 HTTP/2 ?
1.chrome 插件查看:HTTP/2 and SPDY indicator(网站已启用的话,图标显示为蓝色。)
2.直接通过 chrome F12 打开 DevTools -> Network -> protocol,显示 h2 即为已启用。